This post was sponsored by Bun Maternity, the most comfortable nursing apparel I own! All opinions (and emotions) in this post are 100% mine.
From the outset of this post I want to affirm that every mother has her own personal journey with feeding and then weaning her baby. I believe wholeheartedly that “fed is best” and that every mom should do what is best for she and her baby. We each “mom” our own way, and I’m just here to share mine.
My experience with weaning after one year of breastfeeding:
Before having Taylor, and even while I was pregnant, I was actually kind of uncomfortable with the whole concept of breastfeeding. I saw posts of mothers nursing their babies on social media with hashtags like “#normalizebreastfeeding” and I couldn’t imagine that being me. I didn’t think I wanted that experience. I read about the health and bonding benefits and felt, if it were possible for me to provide that for her, that I wanted to do so. Despite my discomfort and questioning on the outset, I made a commitment to breastfeed Taylor for as long as it was possible for me to do so, and for as long as she showed interest.
From the first moment she was laid on my chest, I understood that this is what I was made to do for her and all my previous discomfort (mental, not physical, because that i$h HURT the first 6 weeks!) melted away as a bond I can never put words to began.
Flash forward 354 days and our sacred, stressful, beautiful, and at times even painful journey with nursing has come to an end. To be honest, there is a sadness that’s come over me which started during the last couple weeks of our weaning process. I didn’t recognize the “down” feeling I had as being connected at first; For so long, I had been thinking of all the positives that would come along with being done with nursing (freedom!), but there it was. I didn’t understand how to go about the whole weaning process, so we kind of just started… Right away I saw that she was ready physically and emotionally and, even though I thought I would be, I wasn’t so much. From start to finish weaning lasted less than 3 weeks for us. I cradled her to me in the wee hours of our last morning and tears streamed down my cheeks as I felt her little body relax and flashes of the thousands of times I held, comforted and nourished her in this way passed through my mind.
Bittersweet.That’s the best word to summarize how I feel about the nursing chapter of my relationship with Taylor coming to a close. Bitter: a feeling of loss of something special between just she and I, and missing the baby that I can’t expect to stay small forever. Sweet: a sense of freedom, pride in (barely) making it this far, and gaining back time in the day and my body as my own.
Taylor reaped benefits from nearly twelve months of breastfeeding but, unexpectedly, it was also the best thing for me. My days at home and work were planned around when to nurse or pump. Although (very) frustrating at times, this broke my selfishness and gave me a sense of connection to her even when I was at work – both were things I needed. Although the emotional bond still remains, the end of breastfeeding is a loss of a connection between a mother and child that will never be there again. That’s hard to let go of, and just another sign that my baby is growing up right before my eyes. However, I know that just because she needs me less physically, does not mean she needs less of me. Even though I now have my body back to myself, I will still be 100% there for her in whatever ways she needs me now.
Bun Maternity – Perfect Apparel for Breastfeeding & Beyond
Mirroring the bond that carries over from breastfeeding to independence, the clothing I have from Bun Maternity are also pieces I can continue to wear beyond my breastfeeding days. Bun Maternity has the most stylish, comfortable and convenient, nursing friendly apparel I’ve come across. I only wish I had known about this clothing line sooner. I’m sure I’ll be stocking up when (if we are so lucky) Taylor gets a sibling… Bun Maternity is affordable anyway, but they also offer FREE shipping on orders of $50 or more, and right now you can save 15% on orders over $50 using code SWEET15.
The design and versatility of these ponchos, hoodies, wraps, tees and tanks make it really easy to incorporate breastfeeding easily at any time. No one would guess that these are nursing tops. Plus, they are super comfy and soft, which are musts for me. The three pieces I own are fantastic for times when we’re on the go and I’ve needed to discreetly nurse in public – shopping, going out to eat, rushing back from the gym to a hungry baby, etc.
So Soft Breezy Nursing Hoodie (Navy) – Even though I’m now done with nursing, I will continue to wear this breathable, light-weight hoodie for casual errand running and trips to the gym.
High Low Swing Tank (Kale) – This top comes in several colors, but I couldn’t resist the green/kale. The material is very soft and it looks just like a regular tank but with “secret” side panel access for baby; the ideal tank for a busy day of shopping:
Cozy Nursing Hoodie (Black) – Seriously the most comfortable hoodie I own. If you’re in the market for nursing apparel, definitely snag this one! It is perfect for discreet nursing and the shoulder snap is actually hidden by the hood – you would never guess it’s meant for breastfeeding. I’m definitely continuing to wear this staple beyond breastfeeding. Am I the only one that will wear the same, fav sweatshirt every night for like, a week straight? I may or may not be wearing it right now as I edit this post….
For reference, I am 5’ 10” and wear a size Medium in Bun Maternity apparel.
If you were a nursing mom, I wonder if you can relate to the thoughts and emotions I sorted through during weaning. How did you feel when you were done with breastfeeding? If you’re still nursing, do you have a plan for when and how you’ll wean? I’d love to hear about your own experience in the comments.
This post was sponsored by JuiceBeauty.com. All opinions are 100% mine.
Let’s cut to the chase – I absolutely do look tired – like I’ve aged five years in one even, but with good reason. I had a newborn who slept through the night from 6 weeks to 4 months old, and thought I had it absolutely made…then her sleep patterns suddenly changed. Since 4 months old, she has essentially woken up anywhere from 2 -5 times a night, and she will be one year old in a week. That’s nine months of solid sleep deprivation. Sure, there have been a handful (3 4, but who’s counting) of nights when she has slept from the time we put her down until somewhere between 5:00 and 6:30 AM, but that certainly doesn’t make up for the hours upon hours of dark-circle, puffy-eye inducing lost sleep. Oh, and “sleep when the baby sleeps” is great in theory, but very hard to practice when you’re at work from 7:30 AM to 5:00 PM or just trying to get things done around the house, am I right?
This post isn’t a plea for pity because, A) I know you may be feeling just as tired as I am, and B) I know that being a mama is 100% a blessing, no matter how many hours of sleep I lose. The post is also not about sleep training – what we have tried, what we have been too tired/scared/lazy to stick with, my thoughts/feelings on ‘Cry It Out’, the monthly colds that thwarted our efforts, etc. This is a post about the things well-meaning people have said to me about looking tired that were just not helpful, followed by wishful thinking of things could be said instead. The last thing a tired, emotionally vulnerable (thanks hormones) new mom wants to hear is that she looks as tired as she feel. We already know, but it’s just not fun to be reminded.
Below are some of the things people have said to me about looking tired over the last year, for real:
“I can help you with those perma-bags.” (NOT a good sales tactic…)
“You look SO tired.” (multiple iterations of this one)
“Are you sick?” Me: No, just tired. “I was going to say…you have that look to you.”
“Nursing does that to your face.” (really???)
“Is your baby letting you sleep?” Me: No, not really. “I can tell.”
You know what?
I do look tired. I do have bags and dark circles under my eyes. My skin has become more dehydrated and wrinkled from devoting 99.999% of my physical and mental being to another life over the last year…But, catching up on sleep isn’t really an option in this phase of life (and neither are other chemical laden, anti-aging products when you’re nursing) so comments on looking tired are both anxiety producing and impossible to treat/solve.
I’ve been thinking up some alternatives to, “you look so tired,” that come from the same place of care and concern, but would actually be helpful or even music to a new and/or tired mama’s ears:
“Let me come over and do a couple loads of laundry/watch the baby while you nap for a few hours.” Instant angel status, for sure.
“I can’t believe you have a baby, you look way too well rested.” Just full-on, unabashed false flattery is actually welcome, sometimes.
“I’ll come sleep over and give your baby a bottle when he/she wakes in the night; you just put your earplugs in and get a full night’s sleep – I can imagine you haven’t had that in a while!” – My mom has actually offered to do this multiple times and, while I haven’t taken her up on it, it’s seriously one of the most appreciated gestures a new, tired mama could receive.
Just send me this article to read, written by the amazing, Jena Lee Nardella.
“I found this amazing, anti-aging eye and skin care line that’s safe to use while nursing, and it’s made my eyes and skin look a lot more refreshed and vibrant than I actually feel – wanna try it out with me?”
Seriously though – I really do use an anti-wrinkle eye and skin care line that is not only effective (and smells DELISH), but all natural, organic and safe for nursing moms like me – Juice Beauty. I think you’ll love it as much as I do.
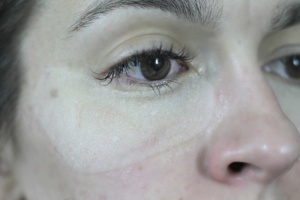
The Stem Cellular Instant Eye Lift Masks and Perfecting Concealer are my cheats to looking more refreshed on days when I’m running on 3 hours of sleep and copious amounts of caffeine; the eye masks are a bit pricey, but they truly do work and I only use them every once in awhile when I really need an extra confidence boost (date night, blog photo shoot, etc.). Juice Beauty even has an apple-based peel that is safe and made specifically for pregnant and nursing mothers to exfoliate, brighten and tone your skin. I wish I had know about that product sooner (next time, God willing, it will be on my skin care rotation).
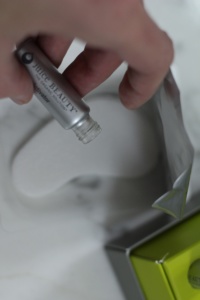
My go-to under eye concealer.Vials of activator.Activate the instant eye-lifting goodness!Wait ten minutes then, voilá, refreshed!
I also had the opportunity to try out the Anti-Wrinkle skin care line over the last couple of weeks and so far I’m really liking it. Clinically Validated Results from a 4 week trial revealed that 95% of women who used the product reported smoother, younger looking skin and 86% reported a significant improvement in the appearance of lines & wrinkles! I hope I can say the same myself in a couple more weeks. I feel like I’m looking less tired already, and it’s certainly not because T is sleeping better… The Anti-Wrinkle regimen is also completely safe to use while pregnant or nursing, whereas many similar lines are not. Juice Beauty uses a combination of fruit stems cells infused into Vitamin C and organic grapeseed to help promote younger, smoother looking skin. Here is a quick run down on each product in the line:
Booster Serum – I noticed a tingly sensation as soon as I put this on my skin, which automatically made me feel like it’s working it’s magic. I also worried a bit that it would dry my skin out, but that has not been the case at all.
Eye Treatment – The eye treatment is applied with a built in applicator so as to avoid any tugging on the eye area. I have been using this eye treatment at night, and my other eye cream during the day.
Moisturizer – I am loving the fresh, citrus smell of this moisturizer. It also creates a tingling (borderline burning) sensation on the skin, yet provides ample hydration. I’ve been using this morning and night.
Exfoliating Peel Spray – This is BY FAR the coolest skin care product I’ve tried! You apply a small, pea-sized amount all over your face, neck and decollatage, rub for about 15-20 seconds and the top layer of dead skin cells begins to pill up. It’s kinda creepy, but obviously effective. Rinse with warm water, and you’ve got a fresh face. I only use this product twice per week because of it’s strength.
Giveaway!
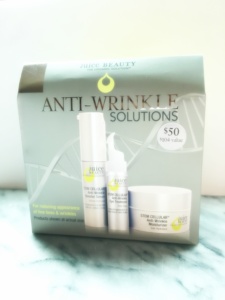
I’m partnering with Juice Beauty to giveaway a 3 product Anti-Wrinkle Solutions Kit. The kit includes Juice Beauty’s anti-wrinkle booster serum, moisturizer, and eye treatment. It is an over $100 value, that is actually on sale for $50 right now, in case you want to go ahead and snag one for yourself.
To enter the Giveaway, become a subscriber by entering your name and email in the fields below. If you are already a subscriber you will not be subscribed twice:
This Giveaway CLOSED on Sunday April 9, 2017 at 12:00AM PST.
The winner will be contacted by email on Monday April 10, 2017.
The winner must respond within 24 hours, or an alternate winner will be selected.
Good Luck!
Has a well meaning friend or colleague said anything to you about looking tired that bugged you? Alternatively, what have loved ones done for you to help you at your most tired?
This page contains affiliate links. Views are 100% mine. If you make a purchase through a link, thank you!
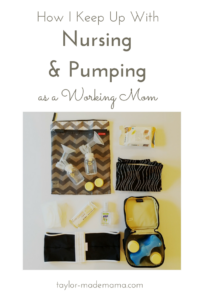
Tomorrow I head back to work 4 days a week after a wonderful two weeks off with my family, which means it’s back to “pump life”! I was thinking about what I’ve learned thus far that has made it possible to continue my nursing relationship with my daughter (8.5 months) and wanted to shared my best advice in case you are or will also become a pumping mama. It’s definitely not easy to continue breastfeeding once you return to work after Maternity Leave, but it’s so worth it! I can offer the following tips, advice and hacks for making the process a little easier and hopefully more successful for you. It can definitely be done with a little strategizing and organization – the following tips have been learned over 5+ months of successful pumping on the job. I hope you find them helpful!
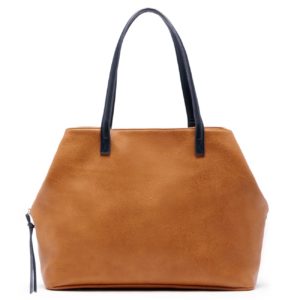
The tote I use for my pumping bag is this one by Sole Society, but here are several others that would be super cute:
1.Know Your Rights
Ask about a place a work with a locked door, not a bathroom, that can be your designated pumping area. It’s actually one of your legal rights as a breastfeeding mother. I’m very fortunate that my employer actually gave me an entirely new office with a locked door so that I could have the privacy I needed. I find I’m actually more productive during the time I pump as; once I set up and turn up the dial on my pump, I hammer away at checking and responding to emails. I save my emails for those times so that I have something specific and productive to tackle.
This bad boy fits right into my pumping bag.My stealth pumping bag by Sole Society.
2. Have a system for cleaning and readying pump and bottle parts at home
I come home, put the milk away (store any extra in the freezer if you produce more than baby eats), fill up a large pot with Breastmilk Removal Soap (seriously, this stuff is SO convenient – no scrubbing required) and super hot water. My mom (who watches Taylor while I’m at work) puts the bottle parts she uses in there as well throughout the day. Dump in all of the bottle and pump parts and soak for 5-10 minutes while you’re doing something else. What I usually do during this time is to ready the two spare bottles, 4 lids and my extra set of pump parts and place them in my pumping bag for the following day – that way all I have to do the next morning is pop in the freezer packs and walk out the door. After 5-10 minutes rinse all the parts with warm water and put on the rack to dry (I LOVE this one by Boon). To read more on my exact workday routine for nursing and pumping read this post.
3. Schedule Your Pump Sessions Like Appointments
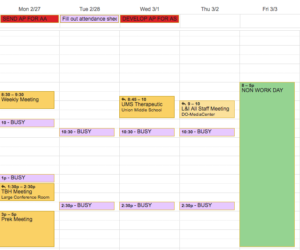
Block off your pumping sessions on your calendar for the entire duration of the time you hope to breastfeed. For me this means I have blocked off 1-2 “BUSY” sessions per day through Taylor’s 1st birthday which is less than 4 months away at this point. This way neither my boss, colleagues or I schedule me for something during a time I need to pump. Schedule the pumping sessions for approximately when your baby is eating at home.
A sample of my schedule in Google Calendar; “busy'” in purple.
4.Utilize a Refrigerator or Cooler
One option to keep your pump parts sanitary between sessions would be to have a mini fridge in your office if you’re there all day. If not, you could store your parts in a ziplock bag or bottle cooler and throw them in the community fridge. I don’t feel quite comfortable doing the latter and am constantly on the go on workdays, so I use this Skip Hop bottle cooler, stored in my pumping bag, to keep the pump parts sanitary in between sessions. I wipe them first with these breast milk removal wipes to add an extra measure of sanitation.
The bottle cooler I use.
5. DWP – Driving While Pumping
Sometimes, to make logistics work, I have to pump in the car whilst driving from one meeting to the next. Not ideal, but a mama’s gotta do what a mama’s gotta do! I carry a baggy of spare batteries in my car as well as an additional set of pumping parts in my Emergency Baby Car Kit (which is also my most popular post!) which is always in my car. It’s also helpful to have a hand pump in your car in case you a) do not have your pumping bag with you or b) you run out of battery power unexpectedly.
My emergency baby car kit.
6. Don’t Freak Out
If you can’t pump twice during the day occasionally don’t freak out (like I did). Your body will likely still produce about the same amount of milk when you pump later in the day, it may just be a little more uncomfortable for you (make sure you have the BRA PADS in!). If you’re short for the day, and you don’t want to yet dip into your freezer stash (read all about how I built mine up during maternity leave in this post), you can pump after the baby goes to sleep at night and hopefully get an extra .5-2 ounces to add to your bottle for the next day. I’ve done that several times for peace of mind.
There you have my top 6 tips for making the pump life work as a working mom. I hope to breastfeed Taylor until her first birthday and will be relying on my tips to get us there, but I would LOVE to hear yours. Please leave me a comment with any additional advice, tips, and tricks you have!
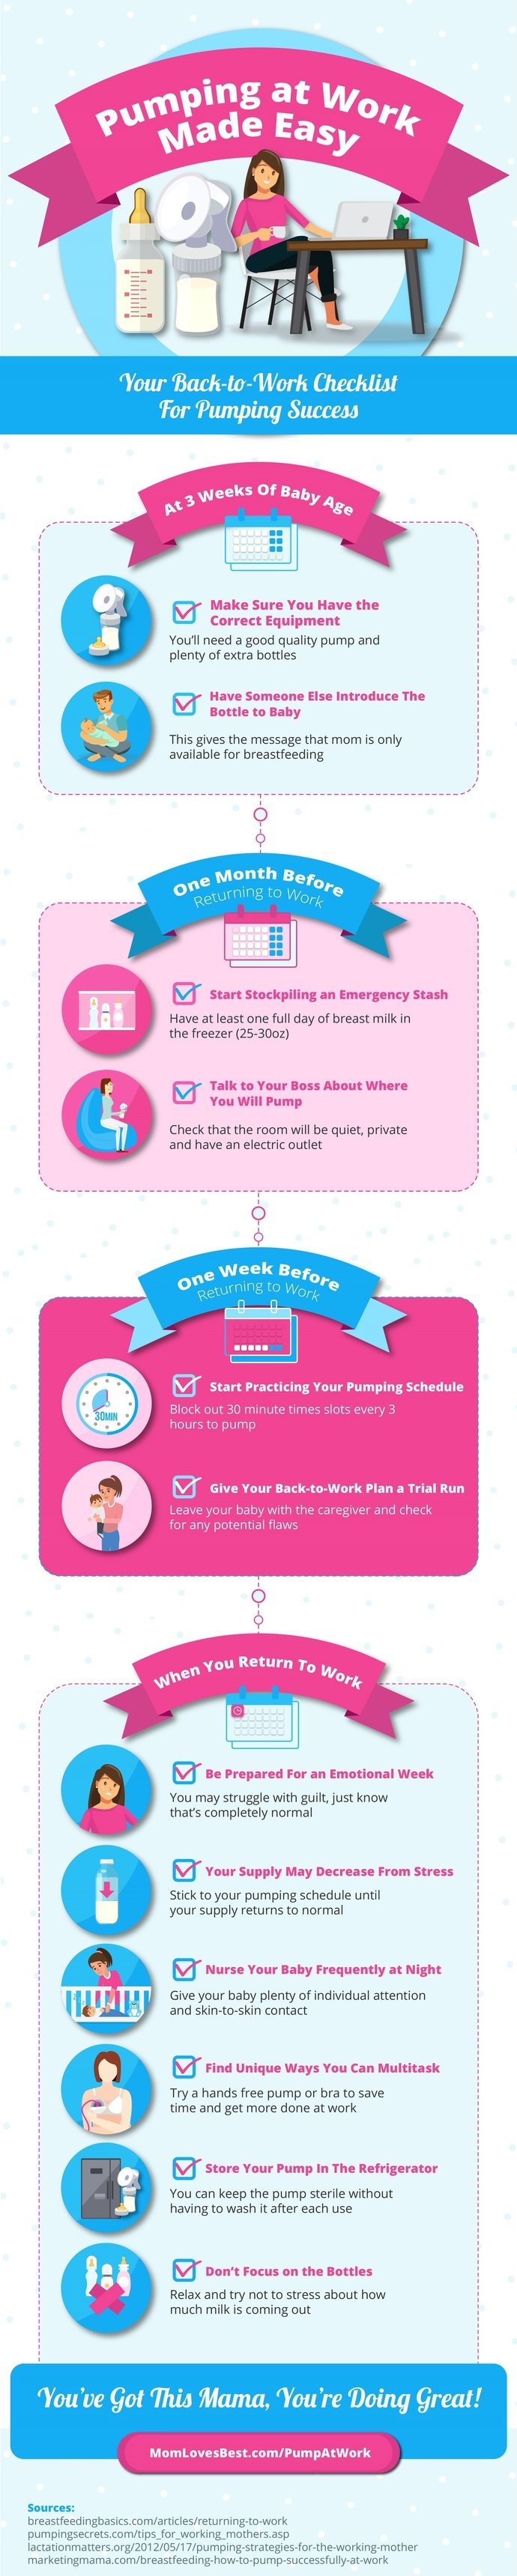
Looking for even more information on returning to work as a pumping mom? Check out The Ultimate Guide To Survive Breast Pumping At Work over on Mom Loves Best – the guide covers everything from women’s rights, a week-by-week guide on how to prepare for your return, sample pumping schedules, and loads of useful tips for pumping moms. She even created a free infographic checklist for you visual learners:
I have the pleasure of sharing with you an interview with a wonderful friend and person who also happens to be a Board Certified Lactation Consultant (IBCLC), Shanon Tipton. I’ve known Shanon for 5+ years now (we met through CrossFit actually!) and not only is she salt of the earth and the most fit mama I know (seriously, it’s insane), but she is also really, really knowledgable about all things breastfeeding and babies. I’m so excited for you to get to know her too and benefit from her wealth of knowledge as much as I have.
My daughter Taylor was born on April 15th, and we had her first wellness check in appointment at the hospital on April 16th. Who was our Charge Nurse/Lactation Consultant in the Pediatric Clinic, completely by coincidence divine intervention? Shanon! What a huge blessing she was to me that day and the weeks that followed. To be honest, I was a complete emotional mess at that appointment – like literally could not stop crying because, hormones – and was so stressed over breastfeeding. First of all, nursing was SUPER painful, and secondly I was incredibly anxious to make sure my milk came in. Looking back, I put so much pressure on myself to have everything all figured out and it freaked me out to not know what on earth I was doing as a mom. Shanon calmed and reassured me that day, and I was able to text her so many questions in the subsequent days that made all the difference in establishing the breastfeeding relationship I so wanted with my baby girl – from what I know, stress is NOT a milk supply booster! I’ve been breastfeeding now for 7.5 months while working outside the home, with (for the most part) success! Check out my top 10 must haves for breastfeeding here and how I built up a breastmilk freezer stash while I was still on maternity leave.
Okay, okay I’m sure you’re thinking, “get to the good stuff already!” so without further ado, here is my interview with Lactation Consultant, Shanon Tipton:
Hi Shanon! Thank you so much for taking the time to answer some questions for my readers and I. I would love if you could start by telling us a little bit about you:
Cheers and congratulations on the birth of your beautiful baby! My name is Shanon Tipton, and I am a Registered Nurse, Fitness Coach, and Internationally Certified Lactation Consultant. I am very excited to share my passion for breastfeeding with you! But first, a little bit about me and my background. I am a wife and proud mother of three beautiful children. For 15 years, I worked as a Registered Nurse in Labor and Delivery helping to bring new life to the world and assisting moms with breastfeeding in the early hours postpartum. Recently, I’ve transitioned to a Pediatric Clinic where I function as a Charge Nurse and Lactation Consultant. I also earned a Bachelor of Science Degree in Exercise Physiology and have the gratifying opportunity to work with personal clients as a Fitness Coach. As a competitive athlete, mother and wife, I understand the unique challenges parents face as they learn to juggle and prioritize the demands of family, work and personal life.
Shanon and her 3 breastfed babies.
What made you decide to become a lactation consultant?
My personal breastfeeding experience began twenty-one years ago with the birth of my daughter Madysn. I was a young, semi-naive, new mommy, unfamiliar with the resources available to support my desire to breastfeed my baby. I remember well the frustration at two days postpartum when my milk had not yet come in, holding a screaming, inconsolable baby. My nipples were cracked and bleeding. I was delirious from sleep deprivation and desperate for relief. That relief came in the form of a Lactation Consultant, who came to my home. I attribute my three year breastfeeding relationship with my daughter, as well as the two children who followed, to the patient and gentle guidance of this wonderful woman. It is my positive and gratifying personal experiences with breastfeeding that fueled my motivation and commitment to obtain my IBCLC (International Board Certified Lactation Consultant).
What is your favorite aspect of your job?
The most gratifying aspect of my job is assisting and supporting parents in developing a positive breastfeeding relationship with their beautiful baby. In my clinic, I have the opportunity to consult with families from 2-5 days postpartum. It’s such a fragile time. Some lucky moms are already on their way to successful breastfeeding. Others are still in the trenches of sleep deprivation, discomfort from delivery, low milk supply and latch issues. My focus is assessing and developing a feeding plan specific to each family and baby’s needs and clinical picture, providing tools and education that can be taken from the clinic into the home. It’s so fun seeing my thriving patients weeks and months later with happy parents in tow!
If you could give your top 3 tips for nursing moms to establish a successful breastfeeding relationship, what would they be?
My top 3 tips for nursing moms in establishing a successful breastfeeding relationship:
1) Be patient and consistent. Establishing a robust milk supply takes time, and learning to achieve a good latch with each feed takes practice.
2) Sleep and nutrition are vitally important during these first few weeks. Eat well, sleep when your baby sleeps, and keep that cute baby close to you. Skin to skin contact will do wonders for your milk supply, as well as yours and your baby’s emotional well-being.
3) Be kind and gentle with yourself. Contrary to what we may hear, breastfeeding does not always come naturally. It’s okay to make mistakes. It’s okay to be frustrated. It’s okay to feel like everything is falling apart. Trust in your abilities as a parent and take comfort in knowing that YOU WILL GET THROUGH THIS!
Many of my friends & readers are new and/or nursing moms. They had some questions I told them I would ask on their behalf when I got the opportunity to interview you:
“Is there a secret to keeping your milk up during a growth spurt?”
One of the many wonderful things about breastfeeding, is that it takes the guesswork out of figuring how much milk your baby needs to grow and thrive. Milk is produced on a supply and demand basis, which means that when the baby enters a growth spurt, your body adjusts naturally by increasing milk production and even changing the composition of your breast milk. Most mommies have sufficient lactation capacity to synthesize at least one-third more milk than their baby typically takes! How great and miraculous is that?!
“I started pumping right away for about 10 min after each feeding. I also had an oversupply. Would that be correlated to my pumping or do some mommas just naturally have an oversupply?”
Some women make far more milk than their baby can comfortably accommodate, which can almost be as big a problem as not making enough milk. Often times this may be a “baby problem” rather than primarily a “maternal problem”. Some babies take a little more time learning to coordinate their “suckle-swallow-breathe”. Fortunately, overproduction problems diminish as the supply and demand mechanism adjusts itself and baby’s coordination improves…about 6-8 weeks post birth. This is also about the amount of time it takes for mom’s milk supply to regulate itself to what baby takes. As far as early pumping and oversupply, my recommendations are as follows…..for moms who experience a delay in lactogenesis (milk production), and baby is losing weight, it is very beneficial to first latch baby effectively to the breast on cue, followed by 5-10 min of pumping on a low setting for additional breast stimulation. Once mom’s milk “comes in” however, I recommend these management tools…
Offer the baby one breast at each feeding, encouraging baby to empty one side. Burp baby and offer the second breast. Start with the second breast at the next feeding.
Pump or hand express to relieve engorgement and discomfort carefully, and only enough to relieve distention. Do not empty the breast completely. Apply a cold compress to ease discomfort.
Feed your baby on demand. Babies have no concept of time and attempting breast feed on a schedule will only cause frustration in the early weeks of life. Ignore the clock and focus on baby’s feeding cues.
Remember….milk is made based on baby’s growth needs. If baby is latching well and seems satisfied following feeding, there’s no real reason to pump afterwards. One less task to worry about!
“How do you wean from a nipple shield and could it be the cause (or part of) my very low and depleting supply?”
There are countless opinions and research articles with regards to nipple shield use. Professionally, I have found them to be extremely beneficial for things like flat/retracted nipples, transitioning babies from bottle to breast, and for babies with weak or disorganized suckles (preterm, neurological problems etc). Personally, the nipple shield kept me from throwing in the towel during the early days postpartum when my nipples felt like they might fall off at any moment. That said, studies show that using a shield can decrease milk intake by about 25%. BUT, if this is the only way baby can latch to the breast, 25% is a pretty good compromise. Extended use of the ultrathin silicon shield has not been shown to be detrimental in any other way. If it’s working, and mom is comfortable with using a shield, by all means don’t change what’s working. However, if mom wishes to eliminate a step in the feeding process, I suggest starting by placing the baby skin-to-skin next to the nipple, starting the feed with the shield and removing it, gradually trying feeds without the shield. Be prepared for some frustration as baby moves through the learning process. With consistency and time, and the absence of anatomical necessity of the shield, baby will be able to latch directly to the breast.
“How do I prevent clogged milk ducts?”
Clogged milk ducts are typically found in mommies who have a large milk supply who do not adequately drain each breast. You’ll know if you have one because you’ll have a reddened tender area that may be warm to the touch . You may also feel a lump and have a fever. If you experience any of these symptoms, please contact your OB/GYN for further evaluation as sometimes antibiotics may be needed. However, there are things you can do to help prevent plugged ducts/mastitis:
Feed baby regularly on demand. Do not skip feeds!
Make sure you’re wearing a non-constricting bra. Take note especially as to how your bra fits under your arm. This is a favorite spot for those ducts to clog. No underwire bras for breastfeeding mamas! Personally, I found great success with sports bras. They are supportive and comfortable without being restrictive, and you can pull your breast out from the top or the bottom.
If you find yourself with a plugged duct, here’s what you can do…
Breast feed often. Begin feeding on the affected breast to promote drainage.
Massage the breast before and during feeding to stimulate milk flow. I like to use lotion and my thumb.
Change baby’s position during feedings to ensure drainage of all the ducts.
Avoid all restrictive clothing. Even the straps on a baby carrier can block ducts.
Studies have shown that Lecithin, 1600 mg daily, can alleviate and prevent clogged milk ducts.
“My babe is 6 months and didn’t gain too much in the last 2 months. Is there a way to fatten my milk? It used to be so thick and creamy and now it’s like skim milk!”
Believe it or not, the nutritional status of the mother does not appear to affect milk volume unless the mother is malnourished. Babies who are exclusively breastfed have the same or even greater weight gain in the first 3-4 months than do formula-fed babies. After this time, formula fed babies consistently weigh more than breastfed babies. Babies gain weight at different rates, and as long as baby is gaining and not losing, and the pediatrician is happy, it’s safe to relax and not worry if weight gain has slowed a bit. The macronutrient make-up, consistency and appearance of breast milk changes constantly, but hindmilk always contains at least twice the amount of fat as compared to foremilk. For mommies who are blessed with a large milk supply, it’s important to have baby COMPLETELY empty one breast before moving on to the next. This way, baby gets a full serving of fat at each meal. Unfortunately, the amount and type of fat that Mom eats doesn’t affect the total amount of fat in breastmilk. No amount of pizza and nachos is going to boost the fat content of your breast milk. Rest assured that by aiming to completely empty at least one breast before switching to the second will ensure baby is getting exactly what he needs.
“What would you suggest to boost production for moms who struggle with milk supply?”
Foods and herbs are used in many cultures to increase milk supply. There’s conflicting evidence however as to whether or not “galactagogues” (agents that promote milk production) really work. Regardless, I have many patients and clients use them with great success. My recommendation? Try them, and if you find something that works, great! The list of claimed galactagogues is long, but a few that you can find at places like Whole Foods are shatavari, torbangum, fenugreek tea and milk thistle. Believe it or not, oatmeal seems to be the shining star favorite among my patients. Healthy, tasty, AND a potential galactagogue!
Wow, I feel like I’ve learned SO much from this interview with you, but I know that other mamas out there likely have trouble-shooting and questions we didn’t have time to touch on. So, my last question is, what kind of services do you offer currently, and how could a mama get in touch with you?
Thank-you so much for your questions and for allowing me to share my personal and professional experience with you as you embark on the amazing journey that is breastfeeding. I am currently available for email and telephone consultations, and am also offering my services via text. I can be contacted at nursechata@hotmail.com. I look forward to offering support, education and guidance tailored to you and your baby’s individual needs.
Thank you SO much for sharing your time and expertise with us, Shanon! I know you’ll continue to help mamas across the country to feel more confident and successful in their breastfeeding journeys.
What other breastfeeding related questions do you still have?
This post contains affiliate links for your convenience. View are 100% mine and I use all products referenced.
At my daughter’s two month check up, her Pediatrician asked if I had started working on a “freezer stash” to prepare for my return to work and the inevitable dip in my milk supply that would go along with it. I thought, ‘ummmm what the heck is a “freezer stash”?’ but replied, “no not yet, but I will soon.” I knew going back to work in 7 weeks would be an emotional rollercoaster anyway, but I hadn’t yet begun to worry about how to mitigate a potential dip in my supply when I initially returned. I have a goal of breastfeeding Taylor for her first year of life, and I didn’t want those first few days back to work to sabotage that goal. The minute I got home I commenced a frantic Pinterest search for how to create a back stock of breast milk while I still had time on maternity leave. My worry fueled me to make the time for and routine to create a freezer stash over the next 40 days or so and, little by little, I ended up with just shy of 100 ounces by the time I went back to work.
I’m so glad that I took that time, even though pumping when you’re home with your baby is super annoying (my hat is off to you if you’re an exclusive pumping mama!), because it alleviated the pressure to pump enough when I first returned to work – that transition was stressful enough already! Fortunately, with the help of my AMAZING and delicious lactation cookies I have been able to keep up with Taylor’s demands thus far, but the stash has come in handy for other reasons I hadn’t thought of:
when my husband and I have gone on a date night a couple of times and my mom has watched her. For me, it’s nice to have that freedom every once in a while.
my hubby has fed her a bottle of my milk at 3AM and so that I could get a full night’s sleep when I was on the edge of total exhaustion during the 4 month sleep regression
to mix in with the homemade baby food I’ve been preparing. I’m only able to pump just enough for the next day at work.
when Taylor had a particularly hungry day and my mom, who is a saint and watches her when I’m at work now that she is no longer at daycare, needed to give her an extra bottle beyond what I’d pumped the day before at work. I’m definitely a “just enough” pumper!
I’m not an expert, but if you are going to be returning back to work soon, I hope some of my experience and resulting advice will help you build up your own freezer stash and have the comfort of knowing you’ve got a backup while you’re getting back into your work routine. We mamas have enough to worry about, right?!
Tips For Building A Freezer Stash
Pump in the morning after putting baby down for 1st nap –
Milk supply is at it’s highest in the morning hours, so this is the time I noticed I would get the most bang for my buck. I usually kept the bottle of pumped milk out until I was certain she would stay down for her nap for a while. If she woke up hungry, I didn’t want to be “out” of milk. No one wants to be tapped out with a cranky, hungry baby! As a side, but very important note, do NOT pump during a growth spurt as your baby will need all the milk you can supply (unless you have an over-supply of breastmilk).
Pump in the evening after putting baby to bed –
Each night I would strap on my handsfree pumping bra, settle down into our comfy couch, and watch a show with my hubby whilst pumping for 20 minutes, or until both sides had emptied. Often I would feel discouraged because I would get so little in the evenings (1-2 ounces), but trust me it adds up! You can always leave that milk in the refrigerator to combine with the next session’s liquid gold before freezing.
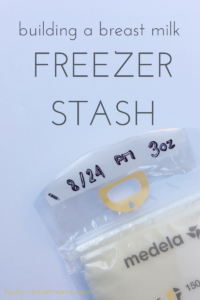
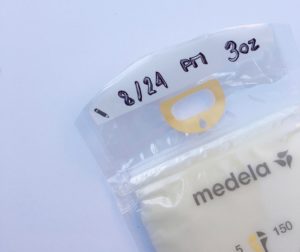
Label your storage bags before pouring in the pumped milk –
I label my bags with a Sharpie, noting the date, time and ounces. Some people note the exact time, but I just delineate between AM and PM. This is important so that you know which milk to use first.
Store the milk in 2 and 3 ounce increments –
Storing milk in 2-3 ounce increments limits the potential for waste. If you fill each bag up to capacity and then thaw it out when needed, but your baby doesn’t eat all of it you can’t re-freeze or refrigerate it and it goes to waste. I froze a few 4-5 ounce bags, but mainly in smaller amounts. Here is a useful link I reference for how much milk to feed at what age.
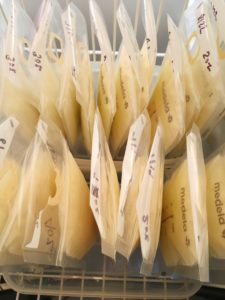
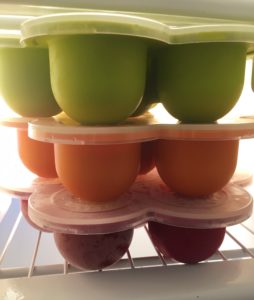
After filling the storage bag, lay it flat to freeze –
After you make sure the bag is TOTALLY sealed (I put that in all caps because I’ve lost milk to a false closure – R.I.P.) lay it flat to freeze. Once frozen it is much easier to line up your little milky soldiers:
You want to be using the oldest milk first. Breast milk can keep in the freezer for up to 6 months, so you’ll walk to keep track. Here is a link from KellyMom.com that gives great guidelines for storing and handling breastmilk, including how long it can keep in the freezer.
That’s how I built up a freezer stash while on Maternity Leave!
I’m definitely not a lactation consultant or expert by any means, but I thought I would share my experience with you in case you find yourself in the same situation (returning back to work) and with the same goal (maintaining your breastfeeding relationship) and want to start your own stash. I know that having one definitely decreased my anxiety about returning to work, and has continued to feel like a safety net for us over the last few months.
If you’ve been through this already, I would love to find out what worked and didn’t work for you in building up your own freezer stash. Or, if you have any questions – I’m here for you!
Thank you for reading.
Other Ta[y]lor-made Mama posts you may be interested in:
This post contains affiliate links for your convenience. All featured products I have purchased and use.
Hey mamas –
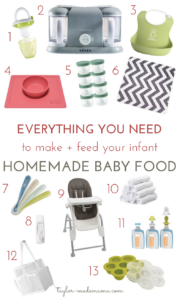
Are you getting ready to introduce solids to your babe? Do you want to save money, and have control over exactly what is going into their little body by making some or all of their food at home? Well, I would like to share the products I’ve been using to make life easier, cleaner and more organized when it comes to making and feeding Taylor homemade baby food. Initially I thought that, as a busy working mom, I wouldn’t be able to do the whole homemade baby food thing. Fortunately, once I started looking into the tools and products available these days, I found that it’s definitely possible and doesn’t take hours a week for me to do. Plus, making baby food at home saves a lot of money – according to Mint.com, homemade organic baby food is nearly 45% cheaper than store-bought organic; homemade non-organic is almost 43% cheaper than store-bought non-organic.
Taylor’s Pediatrician gave us the green light to start solids at her 4 month appointment, but I honestly wasn’t ready. It felt weird to give her food when my body had been all that has sustained her for so long. I waited for another month until she starting showing a lot of interest in our food – even imitating us chewing as we ate. I introduced one new food to her every 3 days or so to make sure she didn’t have an allergy. Now, at 6 months old, she has tried about 10 varieties of food, and combinations of those foods (her favorite so far is quinoa + yam + zucchini).
If you are ready to start feeding solids and/or are also looking to make and feed your little one homemade baby food, I’m hoping this list will be helpful to you.
3. Baby Bjorn bibs – I saw my best friend’s daughter wearing this bib one day and totally stole the idea – my bff seriously has the best ideas! Prior to this, I was going through cloth bibs like nobody’s business and it was making me a little crazy. These bibs are great because they actually catch the food that inevitably dribbles down and can be easily wiped off after a feeding. There are lots of fun colors to choose from too.
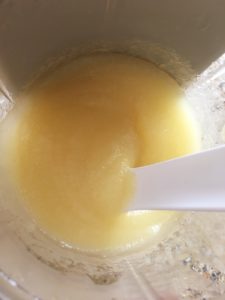
4. EZPZ bowls – These bowls are dishwasher and microwave safe (although I don’t microwave any of her food) but the best part is that they stick to trays and tables, making it impossible for your babe to push, pull or dump the contents as they could with a regular bowl. There are also versions with more than one compartment to hold finger foods.
Excited to try a new pure.EZPZ storage!
5. Sage Spoonfuls storage containers – these are great for storing food that I plan to feed Taylor within the week. I also use these to reheat frozen baby food in the Baba Babycook.
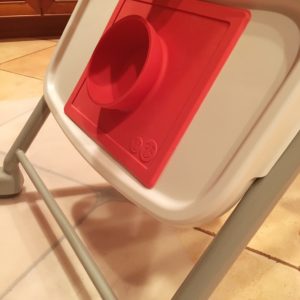
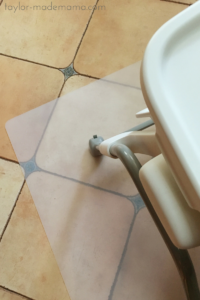
6. Spill mat for underneath the high chair – I bought a mat that would go underneath a desk chair because I liked the idea of clear and simple, but there are some really cute patterned mats made for this exact purpose like this one.
7. Spoons – these silicone spoons by Baba are my favorite. They are BPA, lead and Phthalate free and designed specifically for infants who are just being introduced to solid foods. I’m not sure what spoons to go to next, but for now these are perfect.
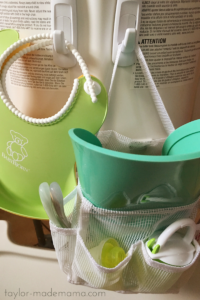
8. 2 Command Hooks – I bought and placed two command hooks on the back of the highchair so that I could store and have easy access to her bibs and all the little parts and gadgets that go along with feeding. See #12 for the shower caddy I use to store everything.
Command hooks for the win!
9. High chair – I am obsessed with this OXO high chair. Highlights are:
you can wheel it around the house as needed (i.e. getting ready in the morning)
it reclines if your babe falls asleep
the seat fabric is super easy to wipe/clean
It’s also very reasonably priced, at less than $120. If money is no object and/or you care about the aesthetics of your baby furniture and products, I would recommend Stokke high chairs. I have a couple friends who have these chairs and they look wonderful in any dining room and also transition into a chair as the baby grows into a toddler and beyond.
10. Washcloths/Water Wipes – I keep several of these and a pack of water wipes (99.9% water and monk fruit extract) in the shower caddy for after meal clean ups.
11. Kiinde squeeze pouches and spoon attachment – I haven’t used these yet, but bought a whole box of 50 for when we are out and about and having a squeeze pouch would be a lot more convenient than a bowl and spoon.I also purchased a funnel attachment so that I can pour pures directly from the blender into the pouches. Taylor also enjoys trying (key word trying) to feed herself, so the flexy spoon attachment will be just perfect!
12. Shower caddy – This is a super cheap shower caddy that is the perfect size to store spoons, washcloths, bowls, etc. and hook onto the back of the high chair.
13. Ice cube trays – I like to use these by Baba because they are super easy to get frozen food out of and into a Ziploc for storage. They’re also dishwasher, freezer and microwave safe.
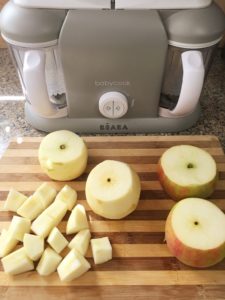
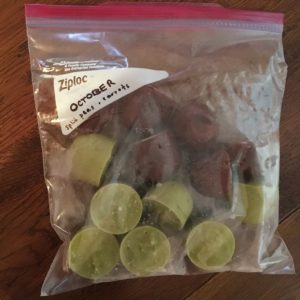
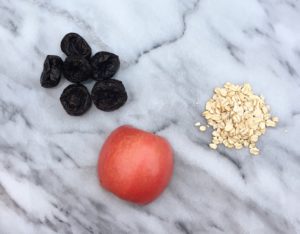
So far, I’m finding that making baby food is a lot of fun. It is also a great way to introduce lots of new foods to Taylor that our family is eating anyway. For example, I made AJ and I some zucchini with our chicken the other night, and threw a few of the cooked pieces into our Baba Babycook and served up a pure for Taylor to try. I personally taste all of the pures to make sure they are actually tasty, and it’s pretty gratifying to see her smile or make a little “mmmm” noise when she likes something I’ve make. Am I going to make every single one of her meals homemade? That would be awesome but probably not, especially when we travel, but luckily there are some great organic baby foods to purchase in a pinch! We tried a new recipe today (to help with the constipation that can come along with beginning solids, poor baby…) that T loved: oats + prunes + pink lady apple.
What are your babe’s favorite foods? Any combos I need to introduce to her? I’d love to hear from you!
Other Taylor-made Mama posts you may be interested in:
This post contains affiliate links for your convenience. The products linked are ones I use and enjoy!
Do you want to increase your milk supply? Are you worried about a dip in your milk production when you return to work after maternity leave, or when your monthly friend finally returns? I know I was!
About a month and a half before I returned to work, I started trying to build up a freezer stash of breastmilk in anticipation of an inevitable dip in my supply. My goal is to breastfeed Taylor up to her 1st birthday, but I knew that wouldn’t be easy with going back to work and I needed a game plan. I would pump once in the evening after I put Taylor to bed, and another time in the early morning, after her 3-4AM feed (find out exactly what I stock in my pumping bag in this post). I noticed I really wasn’t producing much extra, so I started researching ingredients that would give me a needed lactation boost. I came across a recipe that I modified to be almost gluten free (oat flour- yum!) and low sugar, since the concept of intentionally eating cookies all day long was appealing but also not part of my postpartum fitness plan. Exclusively nursing mom’s do need to consume between 300-500 additional calories a day to keep up their milk supply, so make those extra calories work for you and your baby by munching on these cookies.
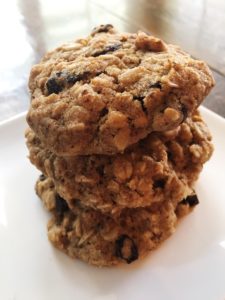
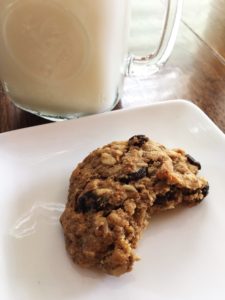
Even my hubby agrees that they’re DELISH!
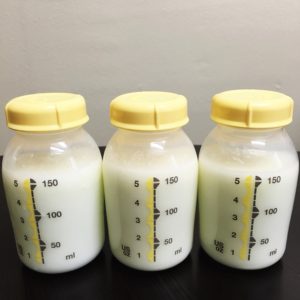
Now that I’m back at work, I make a batch of my trusty cookies every few weeks to provide the added milk supply I need to keep up with pumping enough at work to meet Taylor’s needs. Read more about my working mama pumping/feeding schedule in this post. I notice a 3-4 ounce difference between the days I eat the cookies, and the days I do not. So far, I’ve only had to dip into my freezer stash a couple of times, usually during the weeks when I haven’t taken the time to make a batch. [update as of 1/7/16: I am still breastfeeding and successfully pumping at work, and now take this Honest Co. Lactation Supplement, 2 pills once per day, in addition to eating these cookies when I’ve noticed a dip].
This is 5 ounces more than I was able to pump pre-cookies.
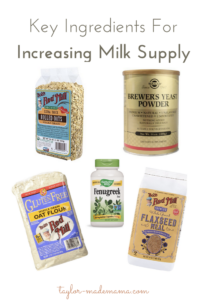
The key to the cookie’s effectiveness is in their super lactation boosting ingredients. Almost all of these ingredients can be purchased through Amazon Prime Pantry, which is an AMAZING resource for us busy mamas with limited time to get into the actual grocery store. You’ll only need to buy most of the ingredients once (i.e. Brewer’s yeast, Fenugreek tablets, oat flour, etc.) because you only use a bit per batch – well worth the initial investment!
Make sure to check out all of my posts related to breastfeeding and weaning HERE! I truly hope you find inspiration, strategies, and encouragement to keep you going on your breastfeeding journey.
Other Taylor-made Mama posts you may be interested in:
Sift together dry ingredients (flour, brewer’s yeast, salt, soda and fenugreek), set aside.
Blend butter and sugars well.
Blend in eggs, one at a time.
Stir in flaxseed mix and vanilla, mix well.
Add dry mixture in three equal parts.
Stir in oats and raisins.
Drop on baking sheet 1 inch apart.
Bake for 10 – 15 minutes.
Ideally, you would space out your cookie consumption throughout the day; when I’m trying to up my milk supply I’ll eat one in the morning, another as a snack at work, and then another in the evening. I always throw a cookie (or two!) in a Ziploc into my pumping bag as a pump sesh snack.
If you find yourself needing a boost in your milk supply like I did, whip up a batch of these and give them 24-48 hours to help you out. Happy snacking/lactating!
This page may contain affiliate links. Views are 100% mine.
First of all, let me start this post by saying that however you feed your baby – be it exclusively pumping, breast or bottle feeding – is awesome. I have no opinion on what is “best” and I don’t think that’s something for anyone to judge. I know many women who wanted to breastfeed their baby but couldn’t, and others who could have but chose not to. All of their babes are growing and thriving because they are being FED. So, to each mama their own!
If you are able and choose to breastfeed like I have, it really helps to know which of the MILLIONS of products out there are actually useful, since there are so many on the market. The list below includes the exact items I have used, liked and had success with. Some of these items I also included on my baby registry essentials post as well. I hope this list is helpful to new mamas who are going the breastfeeding route!
We use Gerber disposable cloth diapers in lieu of burp cloths. I swear at one point I had one of these hanging off every couch arm, chair and bedpost in our home. Taylor had reflux so we may have used more than the average family. I bought three pack of 10 which makes it so that I’m never without several on hand, even if I haven’t done laundry in a while. They are cheap, soft, super absorbent, and I don’t care if I have to throw one away occasionally. You can also place one under your baby’s head for side-lying nursing, so that you don’t get any spills from their little mouth onto your sheets! I think cloth diapers are a pretty good substitute for their oftentimes more expensive burp cloth counterparts, even though these are really, really cute!
The designer of the My Brest Friend nursing pillow is seriously a genius. As a new mom, you and your baby both are trying to figure out this whole breastfeeding thing. It’s not easy by any means, so at least you can be as comfortable as possible during something you’ll spend A LOT of time doing in those first weeks and months. The adjustable, noiseless release {trust me, this comes in handy} buckle allows the pillow to wrap around you to provide nice lumbar support. Unlike a Boppy or other nursing pillow, the surface is very sturdy – I called it my baby tray – that your babe won’t sink down into which really helps you keep good posture.Lastly, the pocket is perfect for storing items you’ll want handy (i.e. TV remote, cell phone, baby nail clipper/file, nipple cream, natural hand sanitizer, mini lotion, etc.). I do recommend having an extra slipcover for it for when you have to change it due to the inevitable spit up, blow out, et. al. They even make a My Brest Friend for nursing twins!!
Protect your bras/camis {and your dignity if you’re leaving the house} by throwing a pair of these in. If you don’t, especially in the first few months of breastfeeding when leaks are bound to happen, the milk can leave stains on your clothes. It’s a good idea to keep a couple spares in your diaper bag and/or pump bag just in case you’re out and about and have forgotten to pop them in before leaving. These disposable nursing pads by Hey Mama are soft,absorbent, reasonably priced, and can we talk about the adorable packaging? They also make a cute tin of all natural, nice-smelling nipple salve!
I recommend these storage bags for any pumped breast milk you will not be feeding your baby right away. I store them in 2-3 oz increments and lay the bags flat in the freezer union they are frozen, which is a big space saver. When it’s time to use the milk, you can easily defrost it under some warm water, pour into the bottle and voila! These are great if you want to create a stash of your breastmilk for when you go back to work.
These look a little bizarre when they’re in your bra, but I swear you will not regret having these for those first few weeks while your body is still getting used to breastfeeding. Trust me, having raw skin rubbing on the inside of your bra and shirt has to be one of the most uncomfortable feelings ever, and these were the only way I was able to alleviate that discomfort. Even if you only need to use them a couple weeks, they’re worth the small investment. I didn’t know about them until one of my best girlfriends clued me in, so I’m hoping I can pay that forward!
That same girlfriend of mine once compared the feeling you have the first few weeks of nursing to a thousand fire ants. Need I say more? The Lactation Consultant at the hospital gave me a sample tube of this Lansinoh cream and told me to use it before and after every feeding, which at the time I thought seemed unnecessary/overkill.Some women have better or worse experiences than I did, but all I can tell you is that using this cream before and after every nursing session was the only way I was able to persevere through the initial discomfort. Don’t get discouraged if it’s painful for several weeks – it was for me. Stick with it, because it truly does get better. If your pain seems greater than normal I would definitely suggest talking to a Lactation Consultant if you can, as soon as you can – they can help with latch and/or positioning issues that could make the difference.
If you plan to pump, you will definitely need extra bottles to go with your pump. I store 4 empty Medela bottles/lids in my pump bag every day, as well as a couple extra lids just in case I forget. You can pop these in the freezer or transfer the pumped milk into storage bags. You can see the rest of what I pack in the pump bag I carry back and forth to work in this post.
A nursing cami and yoga pants was my uniform for the first month after Taylor was born. It just makes life easier – who wants to fuss with anything else when you have a hungry, screaming newborn in your arms?
There are so many out there but here are the tanks, bras and sports bras I actually like that have held up to many, many wears and washings. The Cake bras are by far the most comfortable, in my opinion : )
{I bought some cheapy ones early on but they were not supportive or functional enough. It’s worth the investment, especially if you plan to nurse for a while}:
There are all different styles to choose from, many of which can be disguised as just another part of your outfit. I have several different nursing covers; I store one in my pump bag, one in my diaper bag and one in my car just in case. I love wearing my black infinite nursing scarf for travel days – super convenient. And, hey, if you don’t want to cover up at all then don’t. I’m all for normalizing breastfeeding in public if that’s your comfort level!
Last but not least, a good water bottle WITH a straw. One of the most important things you need to do while you’re breastfeeding is to stay hydrated! You will be especially thirsty in the first few weeks as your supply is coming in. If you become dehydrated, your supply may dry up as well. So yeah, water {and lots of it!} is pretty darn important. Just when you thought you’d get a break from the pregnancy induced 20 bathroom trips a day…. The straw piece just makes it easier to hands-free, lean over and sip on while nursing or especially if you have to pump (i.e. when/if you return to work.). I have two of these, and plan to order two more to keep at work so I can cut down on one thing to schlep back and forth.
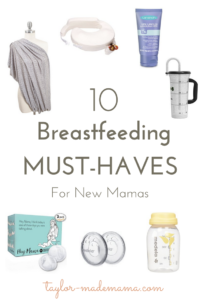
There are my top 10 breastfeeding must-haves for new mamas! Enjoy the special bonding time of feeding your babe, however you choose to : )
This page may contain affiliate links. Views are 100% mine.
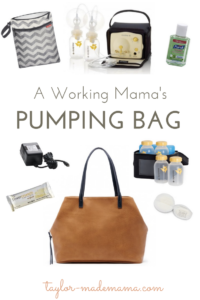
T minus 5 days until the bliss that is Maternity Leave ends, and I return to work. True to the OCD that is within, all my bags are packed and ready to go: gym, daycare, meals, work/computer, and the subject of today’s post – the Pumping Bag! I’m a complete amateur at this working mama thing, so preparing ahead of time makes me feel more confident about the transition back.
Medela Pump in Style Advanced Breast Pump with On the Go Tote
These days, most insurance covers a free breast pump. I chose to purchase my own because I wanted to have it from day one after Taylor’s birth, in case I needed it. Also, I liked the Medela Pump in Style Advanced Breast Pump {not the one covered by my insurance} because it included a spacious tote that was also conspicuous enough for me to bring anywhere I needed to. It has a nice amount of space to store all the gear I need:
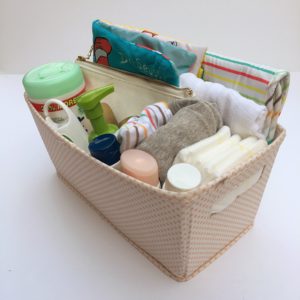
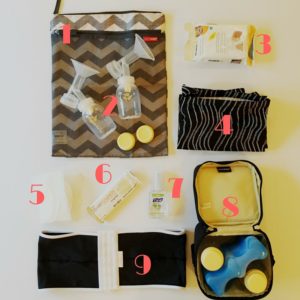
The contents of my Pumping Bag.
1.Wet/Dry Bag: These bags are uber convenient. I also have one for my daycare and diaper bags as well.
2. Extra Pump Parts: I bought an extra set of pump parts so that I don’t have to necessarily wash the parts after each pump. I can just put the used set in the Wet/Dry bag to wash when I get home and use my second set for the next pumping session at work. I also keep two extra bottle lids and filters in the dry pouch.
3. Breast Pump & Accessory Wipes: This is another convenient way to keep everything clean and sanitary, without having access to a sink when you’re on the go. If I’m not on the go, and at my office, I’ll wipe off my pump parts before putting them in the wet/dry bag and put the bag in the refrigerator to keep it sanitary until the next pump. At night, I wash everything with soap and warm water at home.
4. Nursing Cover: In case I need to pump in my car or other non-private location.
6. Snacks! – Power Crunch Protein Energy Bar: These protein bars are seriouslydelish – they have tons of flavor options and taste just like a wafer cookie, I swear.
9. Hands-free pumping bra: This is an absolute must have item. I can still work on my laptop or make phone calls, while taking care of my other business : )
UPDATED 8/27/2016:
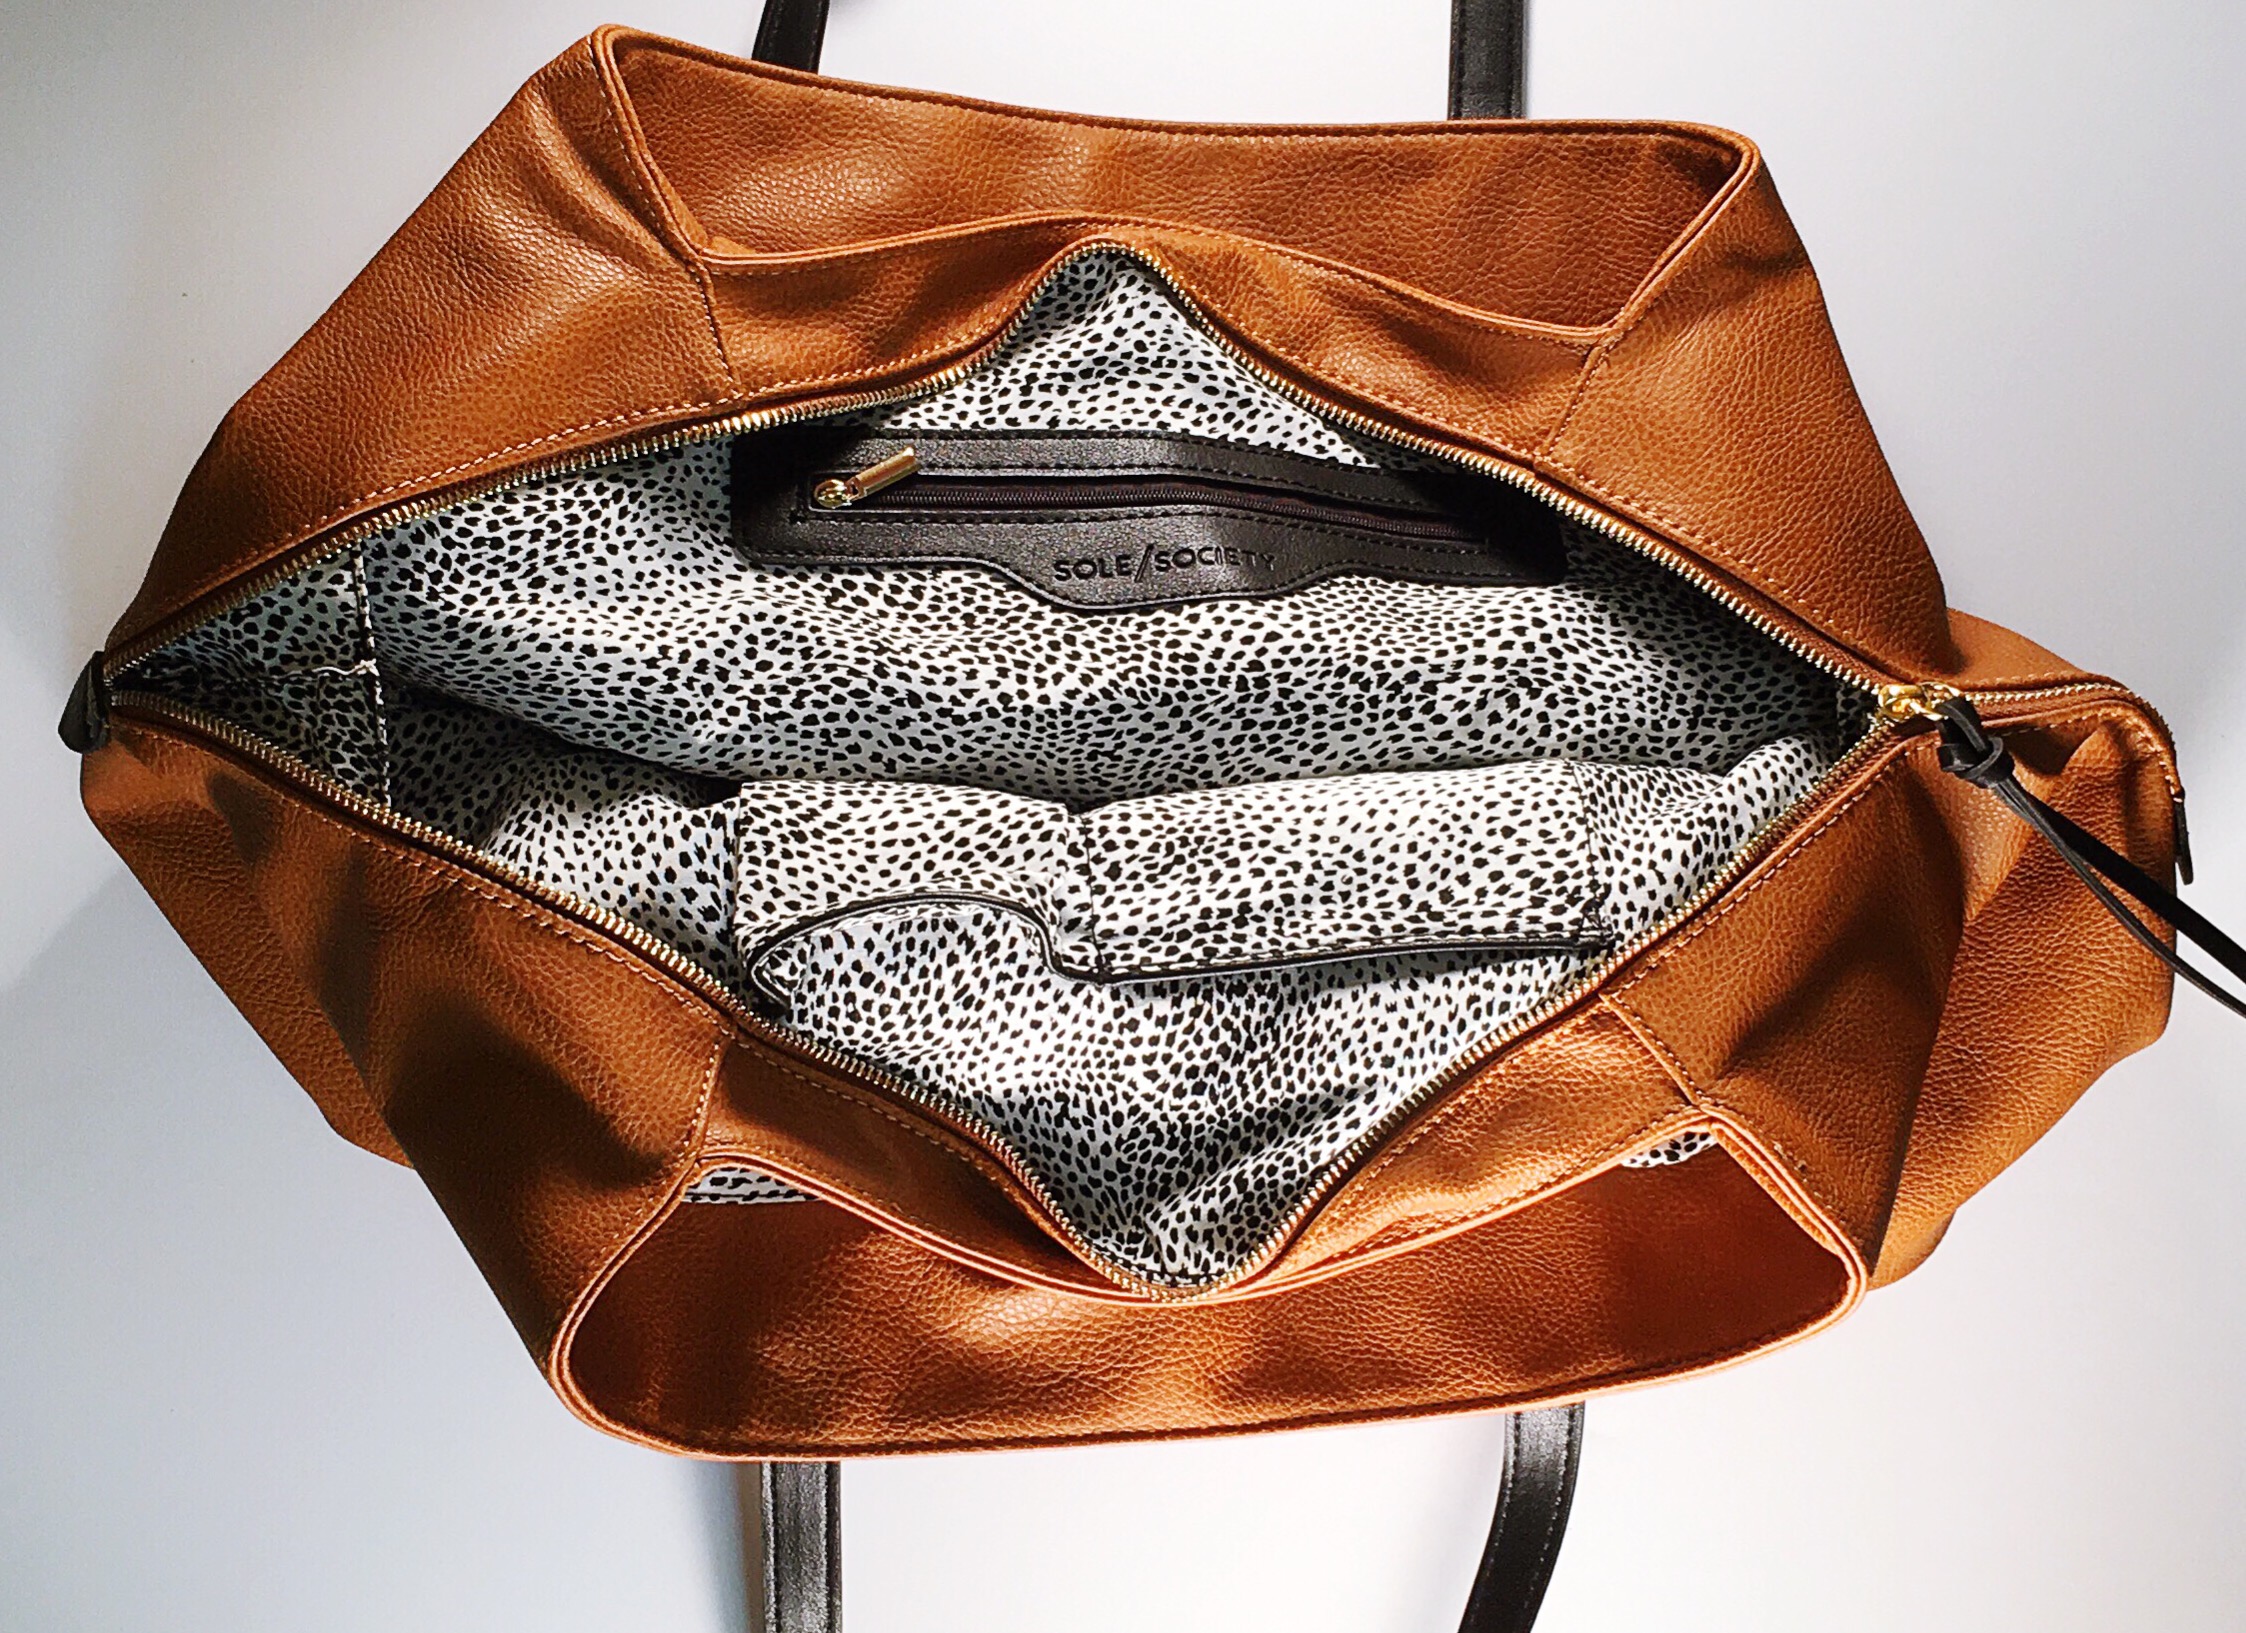
After being back at work for a month, and temporarily not having a private office to take care of business, I decided to transfer all the contents of my Medela tote {see above} into a larger, more inconspicuous, purse-looking bag. As I move throughout the office to whichever destination I end up in for the particular pumping session, no one is the wiser that I’m not just carrying a purse. I found the perfect one by Sole Society:
I also came up with another time saver {and reason for needing a larger bag!}. I now store my pump parts in this Skip Hop cooler in between sessions, essentially utilizing it as a mini fridge. This saves me from needing to wipe down and sanitize in between pumpings!
I hope that this post was helpful for any nursing mamas preparing to head back to work, or gave ideas to add convenience for those who already have returned!
What do you pack in your pump bag? I can’t be the only perma-hungry nursing mama out there – what are your favorite healthy, go-to snacks?
I’ll say up front that I’m pretty much OCD when it comes to organization [e.g. I make crazy timelines and spreadsheets for things that don’t require them]. Organization is a large part of what makes me good at my job, and most of what drives me crazy about myself because my wheels never stop turning. So, naturally, I’ve outlined a routine for work days in order to feel more confident about returning in a week [waaaaaa!] and making sure Taylor is set up for success when I’m away from her.
Figuring out how to pump & breastfeed while working is going to be a challenge, but it’s something that I really want to continue to do for my daughter. I’m incredibly fortunate to have the opportunity to go back to work on a part time basis for this first year as a transition, have a hubby who works from home, and also to have the help of my Mom {Grammy} who will watch Taylor two days of the week. Anyway, I hope my OCD-ness can help my fellow working mamas navigate your returns to work, whether you are pumping/breastfeeding or using formula to feed your babe.
I utilized the sample “Baby Sleep and Feeding Schedules” from Baby Center. There are schedules for 1-12-month-olds with stay-at-home or working moms who either exclusively breastfeed, exclusively pump or formula feed. If you’re looking for something like I made below, this is a great resource!
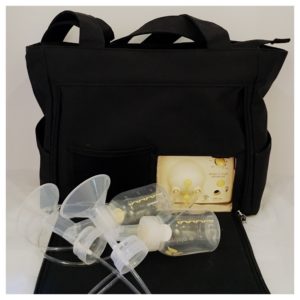
My pumping bag, believe it or not.
Here is the approximate schedule we’ll keep for workdays:
Workday Routine: Breast-feeding + Pumping Mama of a 3.5 Month Old
4:00 a.m.: Nurse, put the baby back down to sleep, leave the monitor with hubby, pump, then get ready for the gym.
4:30 a.m.:Mama gets in her workout at the gym or out in the garage. Or, work on blog stuff.
6:00 a.m.: Mama starts a load of laundry, showers and gets ready for work.
6:30 a.m.: Baby girl wakes up and watches her mobile until Mama is finished getting dressed and readying bottles for daycare or Grammy.
7:00 a.m.:Nurse.
7:20 a.m.: Out the door to drop baby off at daycare by 7:30 and/or head to work if Grammy is coming.
8:30 to 9:45 a.m.:Baby [hopefully] naps.
9:45 a.m.: Baby eats 4-5 ounces breast milk. Mama pumps at work around this time.
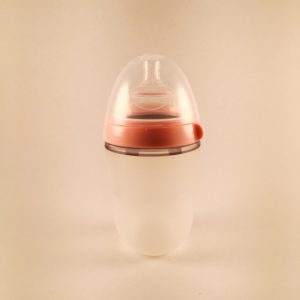
Comotomo – a great bottle for breastfed babes
11:30 a.m. to 12:30 p.m.: Baby [hopefully] naps.
12:30 Â p.m.: Baby nurses or eats 4-5 ounces breast milk. Mama pumps at work during lunch or goes to daycare/home to nurse.
2:00 to 3:00 p.m:Baby [hopefully] naps.
3:00 p.m.:Baby eats 4-5 ounces breast milk. Mama pumps at work, if possible.
If I could go back and do it again, I’d snag this tote for my pumping bag/purse. Click on image to shop!
5:30 p.m.: Mama picks up baby at daycare or returns home if Daddy got her earlier.
5:45 p.m.:Home, nurse.
6:00 p.m.: Put pumped milk in fridge, freeze any extra milk. Baby takes a catnap or has playtime with Daddy.
6:45 p.m.:Start bedtime routine – bath, change into overnight diaper & pj’s, read a book, swaddle, sing Good Night song.
7:00 p.m.:Nurse. Baby falls asleep nursing or needs bouncing on the yoga ball [unless we decide on some type of sleep training, at which point we would put her down drowsy but awake to fall asleep on her own, I think!]
7:30 p.m.: Baby [hopefully] asleep by this time.
7:30 to 9:30 p.m.:Mama prepares pump bag/daycare bag/bottles and lunch for the next day, lays out workout & work clothes, and folds dry laundry [thanks Hubby!]. Reheat prepped food [Sunday/Tuesday], order in or crockpot for dinner. QT with Hubby.
10:00 p.m.:Bedtime
4:00 a.m.:Wake, nurse, baby goes right back to bed. Start all over again : )